Monday, March 27, 2017

Finding Mankind

Quilt No. 118
March 2017

This is one for the doodle addicted.  You know who you are.  You embarrass yourself at meetings as the doodle that began as a few innocent marks in the margin of your notes becomes cultivated into pages of swirls and triangles and leaves with veins and warts.  Harry Potter is defeating a Lord of the Rings dragon, and both are wearing top hats.  Suddenly, you snap back to reality in a quiet room.  All the faces around the meeting table are now turned to the bloom on your page.  The question the chairperson has directed at your deaf and doodling ears is a complete unknown.  You dredge up your best all-situation answer - “It could be possible.”  I’ve learned this the hard way.  Corporations frown on doodling.

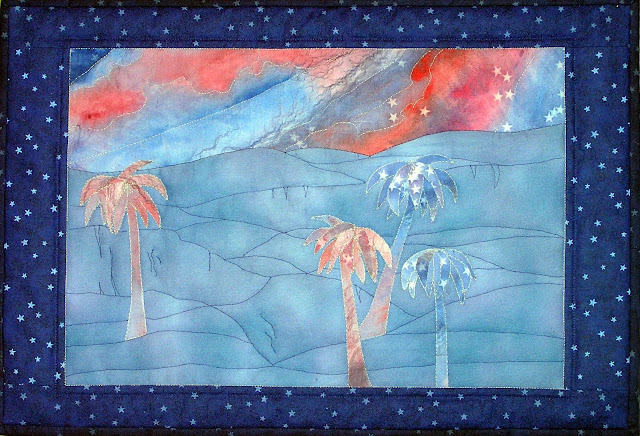
The other circumstance that fosters doodling is the telephone call.  Meetings held on the phone are the worst.  At the end I must tease out my notes from the grip of butterflies.  Fish with large eyes muddle the key points and bubbles obscure the phone number of the key person I’ve been assigned to contact.  I’m also a home doodler.   I was talking to my sister on the phone when Finding Mankind found me.  She is unaware of my doodling ways, and I find it best to keep it that way.  At the end of the phone call I look over the doodles and then throw them away.  However, in this particular one I spotted a man.  He was difficult to distinguish from the background, just like mankind cannot easily be extracted from his environment - despite lofty thoughts to the contrary.  In this quilt you must look carefully. Eventually you too will find mankind.  


Sunday, October 16, 2016

Wysocki's Victorian Street


Wysocki’s Victorian Street
Quilt No. 115
September 2016

I’m still feeling the inspiration of the crewel, crewel world of embroidery-quilt fusion.  Metaphorically, it’s like jumping out of a plane.  Once you cut the embroidery out of its background fabric, you are on an unwavering trajectory.  Hopefully the conclusion will be a pleasing one, but failure to open your parachute or execute a satisfactory quilt will have the same critical ending.  There will be a splat.

It seems lofty to say it, but this quilt started out as a Charles M. Wysocki painting.  His works are fascinating to examine, simple in appeal, rich in detail, rendered in warm tones.  Many of his compositions are fictional towns or villages reminiscent of American life from the 1800’s to the 1930’s.  They beckon you to pack up your steamer trunk and move in.  We can’t all own a Wysocki painting, but we can experience his art through the Wysocki calendars and jigsaw puzzles that have made him so well known. Converting his art into crewel embroidery kits gave us another way to enjoy his designs.

I was surprised to learn how similar his method for creating a painting is to designing an art quilt.  Wysocki did not paint existing places, but used his imagination to take ideas from several sources and bring them together into a new and convincing scene. The  Swoyer's website gives us a peak at the steps involved

Wysocki's method of working is painstaking and methodical. When he gets a concept for a painting, he first draws the various elements on small pieces of tissue paper. There might be two or three or as many as dozens of such mini-pieces. These are moved around, or changed, or developed, or all three, until he is satisfied that he has a balanced composition. He might then do an overall drawing on tissue and then embark on color. If the color is not going properly, he will start all over again to redesign. Sometimes a painting will take weeks to develop. Sometimes all the many elements fit easily and everything seems to fall into place.

I too have used this method, and taking elements from numerous sources, moving them around endlessly until they cooperate and form a into something that matches the murk of my mind’s eye. This was the technique I used for Horse With No Name.  I’ve certainly never been as accomplished as Mr. Wysocki, but having used the same technique does give me some appreciation for the patience it takes to continue rendering a work of art through the frustration of the initial unsuccessful stages.

It was a humbling experience to take Wysocki’s brilliant artwork through yet another rendition in its path from painting, to crewel embroidery, to quilt.  The original framed embroidery had a plain background that left the street floating unanchored in the picture frame. I wanted to take it back a step in time and ground it with earth and sky.

My mother had completed this embroidered piece in the 1990’s.  It hung on the wall of her Ohio home for many years, proudly flying a tiny American flag in her American/Canadian household.  Many years later, the piece looked out from the wall of her Canadian home, the flag still flying and unconcerned with its new location.  Regardless of the location, visitors always paused to admire her handiwork and choose a favourite house on street. 

When I decided to give this embroidery the “quilt treatment”, it took me more than a few weeks to get up the courage just to un-frame it.  Washing it by hand was the next scary step, but both the embroidery and I survived the act.  The background shrank in unison with the crewel wool, but the embroidery floss did not shrink at all. 

My next step was to stabilize the piece with fusible cotton.  I trimmed the background off, carefully snipping around the trees.  I sewed the earth fabric to the sky fabric, and fused the embroidery onto that.  This stabilized everything nicely, and allowed me to machine quilt it with “invisible” thread to give a more three dimensional look to the buildings, people, horses, and so on.  A considerable amount of “touch up” needlework was needed because of the variable way it had shrunk during washing.  I saved this step until the quilt was completely finished so that any additional problems caused during quilting could be fixed at the same time. I finished the quilt with a wide black binding. Surprisingly, the piece went back to looking like…a framed picture.

During the process of quilting this piece it was easy to become lost in the detail, leading to an appreciation of the care and skill both Wysocki and my mother had poured into its creation.  I felt he had scrupulously achieved one of his key goals for his work. "I want drama and light, carefree times or a lonely, heartfelt memory." All of these come to life when you're strolling down Victorian Street.

Tuesday, September 20, 2016

Who's There?

Quilt No. 114
September 2016

Comfort. It’s a bad thing.  Despite the fact that it’s the thing we most desire when we’re toiling away at work, or when we’re swishing our butts around on those metal chairs they set up at graduations, comfort is no longer a good thing.  And the most offensive part of comfort?  Your own personal comfort zone!  It is now imperative for you to remain outside of it, where you will produce new and wondrous works of art.  It doesn’t matter if you gnaw off your arm in frustration along the way to making that art.  It doesn’t matter if you have less fun than the last time you had a root canal and a bunion removal on the same day.  Just like a marathon session of childbirth, the suffering will be erased from your mind when you see the finished product.  At least that’s the theory.

I hear it over and over.  “Get outside your comfort zone.”  This pretty much goes against the grain.  Humanity has spent more than a few millennia courting comfort.  Nearly all of technology has been developed in the name of comfort or its cousin, convenience - which is really just another way to garner comfort.  Ordinary things like eye glasses, air conditioning, bear spray, and Prozac have been invented to give us comfort.  We are genetically programmed to wallow in the blissful comfort of sofas, slippers, and Spandex. But in the same way that adversity fosters the creation of art, tossing aside your comfortable ways and plowing into the danger zone will win you the rewards of creative glory.

My take on this? It’s pure phooey.  All this “reaching” and ‘”stretching” and “pushing” is best saved for episodes of yoga or hockey or putting on those extra small pantyhose you bought by accident.

It is perfectly appropriate to step back inside your comfort zone.  Breathe in the euphoria.  It’s the zone where you are meant to be!  That’s exactly what I did with this quilt.  I deafened myself to the nay-saying anti-comfortists and did a quilt in the appliqué style with which I am infinitely familiar.  It felt utterly liberating.  I didn’t spend hours trying to figure out how to do something novel.  I was free of the grind of problem solving and trouble shooting and cussing over the fact that I was cussing too much. 

This quilt, made from a drawing I saved a few years ago, was a dose of fun.  I was captivated by the owl’s expression and the intimate winter setting.  A story is hanging in the air waiting to be told.  It’s early evening.  The snow has just begun its tentative descent.  The tree trunks huddle together in the sparkling snow, gathering in the silence that marks deep winter.  The owl opens his pink door to see a surprise.  Who’s there?

So, I’ve taken back my comfort zone and in the process I’ve learned something.  Not every endeavor has to supersede the last one.  I can’t believe I didn’t know that.  Sometimes “success” is just satisfaction.

Annoyingly, I’ve lost the source where I found this picture, so I can’t give proper credit to the artist.   While allowing my comfort-addicted brain too much leeway, I simply cannot remember where I found the original drawing.  Book?  Internet? Fever dream?  I wish I knew.  I’m still looking.

October 24, 2016 Addendum!  Thanks to the TinEye Reverse Image Search engine I've located the source of the original drawing for this quilt!  I uploaded the image of the drawing I used to create this quilt and easily found that well known children’s book author and illustrator Arnold Lobel (1933-1987) was the artist.  The drawing, Owl At Home, is the title page for a book of the same name that Mr. Lobel wrote.  He is also the author/illustrator of many other children’s books, including one of my favourite series, Frog and Toad.  Mr Lobel’s Owl At Home drawing came up for auction in 2009.  It was expected to fetch $US 10,000 – 15,000, and was sold along with famous works by Ted Geisel (Dr. Suess) and Maurice Sendak (Where the Wild Things Are).

Monday, April 18, 2016

Killbear Pine: The Canadian Wilderness


Quilt No. 110
March 2016

This year the quilt guild I belong to decided that we were suffering from an embarrassment of riches. It was time to spend like drunken sailors, but instead of cases of rum our plunder would be quilting workshops.  And we wouldn’t go to the workshops, we would have them come to us.  Such is the power that can be wielded when the membership fees finally exceed the expenses.   

For part of our spree we brought in quilter/designer Joni Newman. Her simplified stained glass technique lends itself beautifully to the creation of quilts that capture the Canadian wilderness in a style that is reminiscent of The Group of Seven. 

I remember learning about The Group of Seven in high school art class.  Well…I sort of remember.  When I did a little neuronal fact checking, the bits at my disposal included that there were seven of them and they were artists.  Trees and rocks were involved - especially lonely singleton trees clamped onto rocky shorelines. Tom Thompson came to mind.  I was definitely a little fact impaired. 

Looking to round out my knowledge, I discovered that most of what I knew was incorrect.  While The Group of Seven started off with seven members, they actually ended up with more than seven.  No one thought to change the group name.  They were officially active from 1920-1933, and while Tom Thompson was a major stylistic influence, he was never a member, having passed away in 1917.  And yet we still associate his iconic painting, The Jack Pine, with the Group of Seven.  In essence, their most famous, representative painting was done by a non-member.  It doesn’t get any more Canadian than that.
The Jack Pine/Tom Thompson 1917

Believing that a distinct Canadian art could be developed through direct contact with nature, the Group was best known for their paintings of the Canadian landscape. Over eighty years later we still adore their paintings and I still yell “Group of Seven!” whenever I spot a lone gnarly pine tree against a backdrop of granite.

I was able to add my own touch to Joni’s Killbear Pine design by pillaging my stash and using some of the blue fabrics I’d previously dyed.  The particular design is based on the scenery of Killbear Provincial Park, located on the Georgian bay shoreline of Lake Huron, part of Ontario’s Great Lakes. 


Saturday, April 16, 2016

Seagulls

Quilt No. 111
April 2016


This quilt started out decades ago as a piece of crewel embroidery crafted by my mother.   A single long panel contained the scene of seagulls on a beach.  It was framed without glass, lounged around on one wall or another for many years, and eventually was packed away when my mother moved.

Original embroidery, removed from frame.
I felt it still had some life left in it so I thought about how I might use it to create a new quilt.  I removed it from the frame, washed it, stabilized it with fusible cotton, and sectioned it vertically into pieces.  These pieces were then fused onto the dark blue fabric.  A border was added and the piece was machine quilted.  I could almost hear the seagulls squawking.

You could trace the trajectory of my mother’s life by her needlework.  Earlier pieces of traditional embroidery included decoration and borders on table cloths and hand towels and more than a few dresser scarves. You don’t hear the term “dresser scarf” too often anymore, but at one time a young lady’s trousseau had better contain at least a dozen if she was going to snag a husband.  I assumed that dresser scarves no longer existed in the modern world but when I Googled the term I was proven wrong.  Walmart has a couple of dozen stamped dresser scarves that you can order.  The needlework and the lamplight is up to you.  You might also want to call them “table runners” if you’re in a more contemporary mood.  So while the need for a trousseau has been shed along with the girdle, Walmart and women have at least managed to preserve the dresser scarf tradition.

After many years of marriage and the demise of the traditional dresser scarf – which was deemed as out of style by my mother in the late 1970’s – my mother took up crewel embroidery.  Dimensions Crafts and other embroidery kits were available everywhere and in every degree of complexity.  My mother worked her way through many of these during evenings ensconced on the couch with my dad, watching Gunsmoke, Perry Mason, and Bonanza.  It was put away for Hockey Night in Canada – you can’t do needlework and follow the puck at the same time!

After my dad passed away, Mom put away the crewel work.  It felt too sad, too tied up with Dad who was no longer on the other end of the couch.  A decade passed and my mother remarried.  She returned to her embroidery, sharing 60 Minutes and Alf with a new partner in the adjacent Lazy Boy.  She returned to her crewel work.  No picture was too complicated as she worked her way through the complicated stitches that grew into flowers, birds, whole towns.  Sadly, that partner was taken from her as well, and her desire for needlework faded away once again.  But my mother had a truly indomitable spirit.  In her eighties she once again thought about doing needlework, and asked me from her hospital bed if I would bring her one of her untouched kits.  I worried that her physical limitations would just end up frustrating her, but kept my fears to myself.  We spent a pleasant afternoon unpacking the wool in the kit and sorting out the colors, debating which strands were pink, light pink, very light pink, or coral.  The success of crewel work depends as much on organizing the numerous wool strands by colour as it does on the crafter’s ability to wield a needle. 

During her hospital stay Mom did some of her very best crewel pieces and delighted visitors, staff, and other patients with her progress and the generous gifts of her completed works.  Once again it brought both contentment and purposefulness back into her life.  Little did she know that it would also have the power to reconnect us in the future.

Friday, January 15, 2016

Deep in the Scrappy Forest


Quilt No 109
January 2016

A frog pops his head up from behind a rock.  He surveys all that he sees.  It’s definitely frog-worthy.  He's met the challenge - he’s deep in a scrappy forest.

I’m beginning to suspect that maybe, just maybe, having limits placed on you might make you a better quilter.  Oddly, this same philosophy applies to child rearing as well.  Too many loosey­-goosey parameters and the quilt or child becomes a wild and unruly beast, an annoyance to everyone in its sphere of influence.  But...add a few limitations and you get just enough latitude to nudge it along to become all that it can be.

This year’s annual guild challenge was to make a “scrappy quilt”.  This means to take all the leftovers from other quilts and make a new quilt out of those. To accommodate quilters at all levels challenges are kept straight forward.  They never involve wild ideas, impossible to achieve technicalities, or the spending of giant sums of money.  Decisions about size or colour or complexity are left up to each quilter.  The fewer the restrictions, the greater the yield of quilts.  The challenge is not so much about following the rules as it is about making the theme your own.

When the scrappy quilt challenge was announced everyone turned to look at their seat mate and nodded their heads approvingly.  Yep.  Everyone had at least a refrigerator-sized pile of fabric scraps they could plunge into.  Ultimately, some people dove into their pile so many times that they made three or four quilts.  In a few cases, previously undiscovered nieces and nephews got new quilts from an aunt they’d never heard of.  

I couldn’t wait to make the challenge my own.

Two weekends after the announcement of the challenge I was at the cottage.  This is a place that is on a lake in the bush (we don’t use the word “forest” in Northern Ontario).  I go there with my sewing machine and a large box of fabric every weekend.  I also cart along a lot of other things of lesser importance, like food and water.  I’ve forgotten various components of these over the years but I’ve never forgotten my sewing machine.  I’ve never even forgotten my sewing machine cord – a common rookie error among quilting workshop attendees.  One memorable weekend I forgot the quilt I was working on.  I just started on another one with what I found in the box, and came up with the tiny quilt, Looking for Atlantis.  I decided to do a repeat performance for the scrappy quilt. 

My plan evolved.  I would make my scrap fabric quilt exclusively out of the fabrics I found in the box.  Generally, I have a couple of quilts on the go.  For every fabric I use in a quilt, a dozen different fabrics may be “auditioned” before I select the final piece, so there’s always a wide variety of fabric battling for space in the box.  Fortunately, I only need small pieces for my quilts, so I can make do with a single largish box.

I had tried to tame the bits and pieces in the box using two bags for scraps.  One had ordinary scraps and the other had scraps that had some sort of fusible material already ironed onto the back.  Fusibles allow you to iron pieces of fabric directly onto the quilt top.  All of the scraps were relatively small and irregular in shape, mere shards left from one quilt or another.  Only the tail ends of quilt binding strips had any straight edges.  I narrowed my challenge even further and vowed to make my scrappy quilt top using only the scraps in those two bags.  There!  I’d made the challenge my own

Here are a few items from the scrap bags.
 As much as possible I let the scraps dictate the composition.  Leftover appliqué trees that didn’t make it into a previous quilt were used. The longer horizontal strips near the top of the quilt suggested the curvy lines of forested hills, so I used those just the way I found them.  When I began working on the border I found I was short of fabric. I ultimately had to stray outside of the two bags from the cottage box and add in some pieces from another box of scraps at home.  It wasn’t really cheating, since they were still scraps.  And when you set the limits yourself, you’re allowed to alter them.  I came up with that rule myself.  It’s the spirit of the limits that count.

When all the scraps had coalesced their cosmic dust into the universe of a new quilt, the stars from Lost on the Ocean had found a new home.  The trees from Reach for the Stars were rediscovered, and the flowers from Horse with No Name had moved out of the desert/ocean and taken root near a swamp. The frog near the rocks had recovered from being passed over for a previous post card quilt. 

Surprisingly, the multiple layers of fused fabric I used in this quilt kept it nice and flat, suggesting that I had previously been under utilizing stabilizers.  Who knew?  By doing most of the decorative and raw edge appliqué stitching only on the quilt top everything stayed smooth.  No dreaded ripples took hold after I added the batting and backing and did the machine quilting.  And, best of all, the abandoned quilt scraps settled down happily into their new life deep in their own forest.  They would never be mere scraps again.

Tuesday, December 15, 2015

Light and Dark in the City

Quilt No. 108
December 2015

Every so often a challenge will come your way.  Sometimes you duck it, sometimes you plunge head long into it, throwing caution and your underwear into the wind.  Light and Dark in the City was kind of like that.  And it all started with a paper bag.

A couple of weeks before Christmas a “paper bag challenge” was announced at quilt guild.  It works like this.  Fabric, notions and sometimes other non-cloth fibre items are put into a small paper bag.  Batting is included, and the quilter who receives the bag must make a small quilt with only the items found in the bag. She can use her own thread and tools, but she may not add any fabric to it.  Sounds pretty simple.  Until you open the bag.

Some of the items in the paper bag.
I’ve never gotten to do one of these before.  Generally, there are only two paper bags, for two lucky quilters.  People who want to give this a shot put their names in a draw.  This particular time not too many people entered.  Everyone was eyeball deep in Christmas preparations at home and the project had to be completed by the next meeting, a measly two weeks away.  My odds of winning one of the bags were considerably better than usual with fewer names in the draw.  And I was pretty darn pleased when my name was announced. 

The bag contained about twenty pieces of fabric in solid colours, or “solids” in quilt world jargon.  The colours were completely random, not necessarily colours you would intuitively partner up together.  There was one print – a black fabric with small white dots.  All these pieces were fairly small and varied in size.  Also included was a placemat sized piece of batting, and two larger pieces of black cotton.  And...a tiny baggie with  red, green, and black woolish pieces in it.  I heard someone behind me say, “Oh, there’s roving too.”  I pretended to know what that meant.  Someone else said, sagely, “Ah, for felting.”  Roving? Felting?  Was it too late to re-raffle the paper bag?  I was supposed to create a quilt and learn how to felt in two weeks?  All while Christmasing-up my house? Gulp.

I brought the paper bag home and placed the pieces on my quilting table.  There were a lot of longish strips – immediately the idea of doing skyscrapers came to me.  I am quite fond of quilting cities (Before, Blue collar).  There wasn’t a lot of time to ruminate about it.  Sometimes I can spend way more than two weeks just thinking about a quilt before I start designing.  This was not going to be one of those times. 

 "Before" a city quilt I made after 9/11.
To get myself started I consulted my favourite coffee table book, Skyscrapers.  This book profiles several famous buildings and gets your mind past the idea that all buildings are tall boxes that are stubbornly rectangular.  It launched my project with a few buildings that were varied in shape, allowing me to comfortably default back to my own building creations...all of which were rectangular boxes. 

I wanted to create a harbour skyline, a long one.  However, this was limited by the size of the batting, which was cut to the dimensions of a placemat.  Ha!  Limiting factor or not, I could at least alter the batting into a long and narrow shape by cutting and piecing it, two activities that basically define quilting.  This generated a new limiting factor – I now had a maximum of 8 ½ inches for those tall skyscrapers.  Not much room left for the water – and no city skyline looks quite right unless it’s on water.  Night time city skylines also have those grand reflections in the harbour water – I wanted to capture those too.  There was just enough room to squeeze in some light reflections using my favourite shiny rayon thread.

To use up the roving - whatever it is - I machine quilted over it to create clouds.  Learning to felt would have to wait for another day.  Or another challenge. 

I finished the piecing and the quilting and turned to my carefully conserved strips of black that I’d saved for the binding.  I was four inches short.  I had three other pieces left that were big enough to help me out – white, hot pink, and the black/white dot piece.  I decided to use the hot pink. To make it look like I’d planned it that way all along, I ran the pink fabric through the printer and printed out the name of the quilt on it.  After many test pieces I was able to sew it on so that the words lined up centered in the quarter inch wide piece of pink on the binding.  Alas, the pink was then too dominant and distracting.  I fused in some strips of black to de-emphasize it as much as I could.  It would have to do – painting black over the pink would have sent me straight to the cheater’s list.

Julie and Linda with their tale of two cities.
I willed myself not to email Linda, the quilter who was doing the same challenge, to see if she would divulge what subject she had chosen for her paper bag project.  When it came time to reveal the quilts at the meeting, we were flabbergasted to find that both of us had created cities.  The cities were radically different with mine horizontal and narrow and distant, and hers an intimate close-up of a warm urban place with an actual felted tree and a felted roof. 

I would have to say that I truly learned a lot from this challenge.  But, nope, I didn't learn how to do felting. I'm saving that for another day.

Monday, December 14, 2015

Never Forget


Quilt No. 47 January 2006 / machine quilting completed November 2015

One minute of silence seems hardly enough time in which to reflect on the wars of the past, let alone the worries of the present.  But in 2005, as I sat at my desk at work, the one minute of silence on Remembrance Day was enough time to have the entire design of this quilt slip past the background of my thoughts.  I put it on paper, and began working on it soon after, completing the quilt in January 2006.  The quilt has since traveled around to a few Remembrance Day displays, but I was never quite content with it.

By 2015 I had an additional decade of quilting experience under my belt, having completed over 100 quilts.  I was “renovating” some of my older quilts – a great way to practice my machine quilting skills.  Just like archery, restringing your banjo, and taxidermy, machine quilting is a skill.  And the only way to acquire a skill is to practice it. Yes, your teachers, your mother and those pesky nuns who taught you piano were all right.  You have to practice.  Don’t fool yourself into thinking that James Bond automatically knew how to slay bad guys, woo beautiful women, and fly any object with wings and a motor.  He had to spend plenty of time practicing all that stuff until he got it perfect.  Machine quilting is exactly the same, minus the bullets and the helicopters.

I was convinced machine quilting this piece would be a couple of afternoon’s work.  Possibly my eyes were crusted over with stupidity – it’s hard to imagine a more inaccurate time line for a project. I first went with a fairly widely spaced round of quilting.  It looked so bad I thought I might have to demote it and use it as a door mat.  At the back door.  I then got serious about doing this quilt right, and machine stitched carefully around every object on the quilt.  Also, the poppies had originally been meant to look as though they were lying on the lawn.  I know.  It never worked for me either.  I added in stems and leaves to push the poppies into the foreground where they belonged.  I then very closely machine quilted the entire quilt.  This caused the side borders to puff out like relentless waves rolling in on a beach.  No matter how much quilting I added to the borders they would not be tamed.  Ultimately, like many things that are defiant without explanation, they had to be cut loose.  Chopped.  Banished.  After all, there was the good of the whole to consider.  A fitting philosophy perhaps, for a quilt depicting the results of war. 

The above photo shows the machine quilting on the back of Never Forget


.